Member Gallery: C&C cages/homemade cages

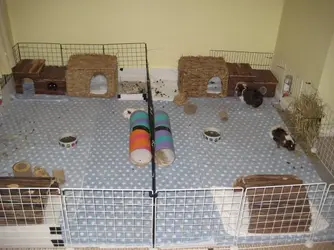
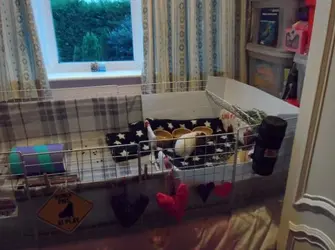
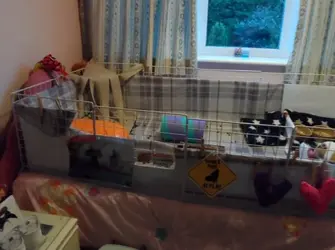
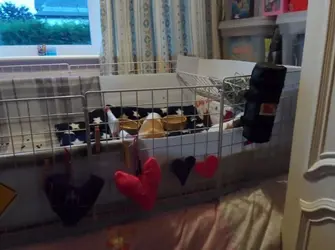
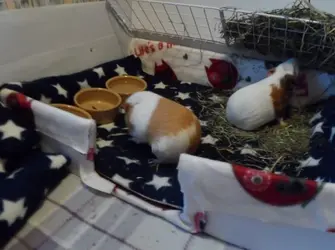
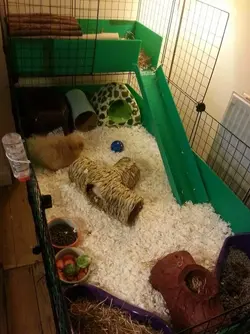
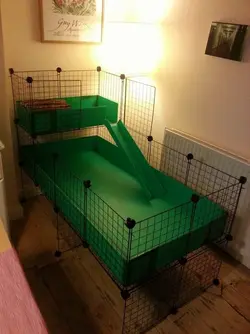
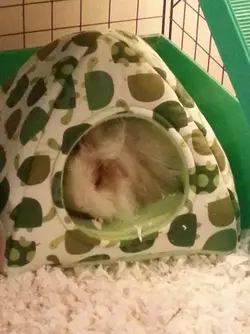
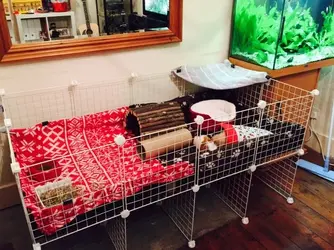
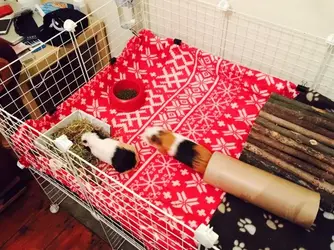
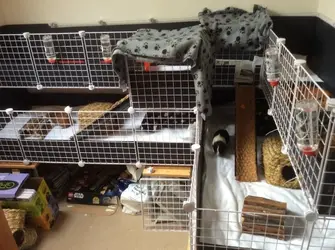
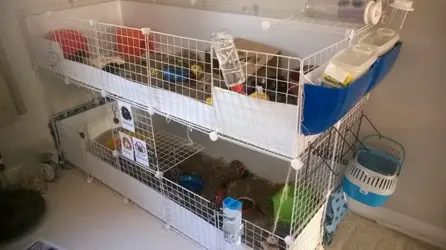
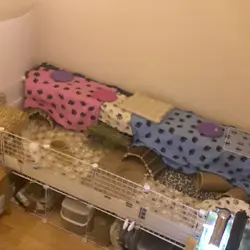
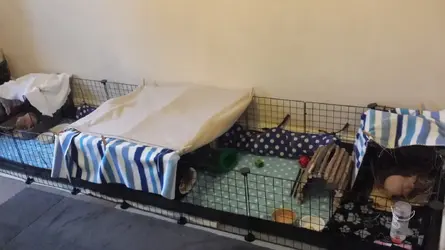
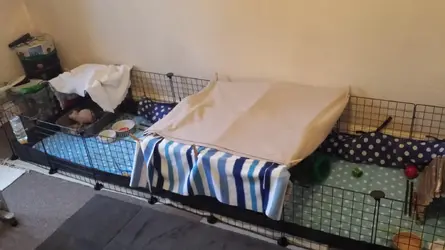
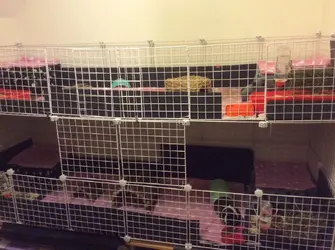
029.webp Wow! There are some very ingenious and good looking piggie cages shown here. A lot of people have gone to an awful lot of trouble and expense to make their piggies happy. I have eight piggies; four in the big spare room and four in my bedroom. Here is a picture of the set-up in my bedroom. Can you see Crow Feather peering out from the Log cabin on the left?
The black C and C squares and the base I bought from "CandC Cages.co.uk" £55 + £15 p+p

The white squares I got from DisplaySense.co.uk". They also sell connectors and the white things that the squares slot into.

The cage-liners and small liners underneath the log cabins were made to measure by Ziggy at "Ziggy'sPiggies.co.uk" (email: [email protected]) £90 for 4 2 x 5 size, £40 for 12 small size, inc p+p

Grass huts, Log cabins and wooden bridges from Zooplus.co.uk.

As I have a spare liner, I can wash one and replace it with the spare. Only two piggies live in each cage, so it takes along time for the liners to get really dirty. I sweep up loose hay and poops every morning and vacuum when the piggies are out on the grass. Since taking this picture, I have replaced the white towel in the corner with another litter tray, and, yes, they do use them! Also, I have now put Profleece (from Profleece.com) inside the grass huts , with towel underneath to protect the base of the hut from wee.
 
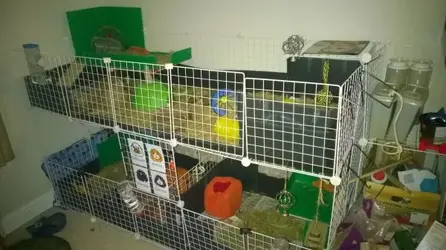
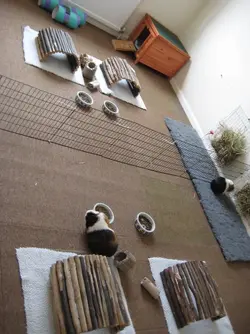
As I have just posted details of my piggies cages in my bedroom, I thought you might like to see the set-up in the spare room. This was much simpler and required just dividing the 12'X 8' room in half. Then all that was needed was furniture. The divide was made out of the fox-proof wire panels from Hutch doors. The white panel on the wall is one side of a metal run. Initially, the Profleece mats under the hay racks were kept in Corroplast trays to prevent hay and poops from being kicked everywhere, but I have found that the Profleece holds most of it in place, kind of. I used to use Megazorb in the litter trays but it got kicked everywhere and caught in the long-haireds' coats. Again, as in the bedroom, only two piggies live in each half.
044.webp .
 
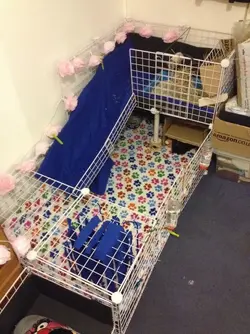
2x4 c&c with a 2x1 hay loft (10.5ft square area for floor area).
I ordered the Seville Storage grids from Amazon for £30 with delivery.
I only have one Piggy right now, waiting to find him the right friend to adopt.
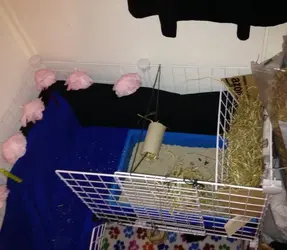
Its really easy to keep clean, just hoover the poop/hay up every day and change the fleece twice a week. I have 2 lots so I don't have to wait for them to dry :) He now has a c&c bunk bed to replace the cardboard one that was in there when I took these photos and Ive put one of the water bottles up in the loft :)
IMG_1969.webp IMG_1973.webp
 
image.webp

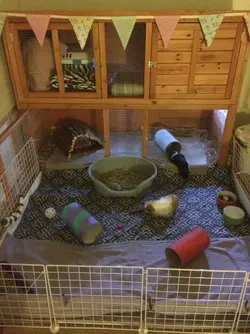
This is Ginny and Moira's new house! The hutch is the bluebell one which was always used inside, but seeing as they never got the hang of the stairs no matter what I tried I just took them out and use the top for storage :)
I attached a c and c to it, and any future piggies (very likely haha) can either join them and I'll extend it, or I can build from the top layer

Grids were from super bargains uk, I think it was under £30 for 30 and correx was £10 from my local sign shop

They love it :)
 
this harolds house its pretty boring compared to some of the fab ones ive seen on here

he has a large storage box with toweling on the floor and his water bottle in it he has a tunnel to get into it

the main area has lino flooring and he has a big mirror and foodbowl

he has a litter tray with logs over it to make a house and we put all his hay in there and he has a tent with furry lining
 

Attachments

  • 20141005_151333.webp
    20141005_151333.webp
    25.2 KB · Views: 107
Here's my c&c cage, they will come in here during the cold/winter months.

Type: C&c with correx base and grid sides, this cage sits on a single bed.
Size: 5x2 with a 2x2 and a half kitchen correx/fleece insert. Front correx wall is 8" tall, back and side walls are 12", there is no roof.
Made: By me, using correx, grids and cable ties. Hay rack also made by me.
Where: Seville storage cubes and cable ties were purchased from Amazon, and Correx was from eBay.
How many piggies? We have 2, Lily and Lola in this c&c.
We find it really easy to clean.

How it was made: Cable ties used to secure the grids, then measured correx, cut out and then assembled the correx, hay rack made too with two grids bent, and correx backing to keep hay contained. The cage was made in the usual manner.

Excuse the poop, they were extremely excited when they were introduced to the cage, whilst the garage roof was being done! They normally live in the hutch, but the girls love the c&c so much, this is their winter accommodation.
SAM_1212 EDIT.webp SAM_1213 EDIT.webp SAM_1215 EDIT.webp SAM_1217 EDIT.webp SAM_1218 EDIT.webp SAM_1220 EDIT.webp
 
Cage type - C&C (we used vinyl instead of correx)
Where it was purchased - grids were bought from Super Bargains UK & vinyl was from a local carpet shop
Size - 6 x 4 grids
Guinea pigs living there - 4 (3 girls & 1 neutered boy)
I find it easy to clean because my guinea pigs use the litter tray and hutch (which have wood-shavings in) for their pee + poop so it's fairly quick to clean!
My herd love this setup - they are much more active then they were in their previous cage :)
P1080956.webp
 
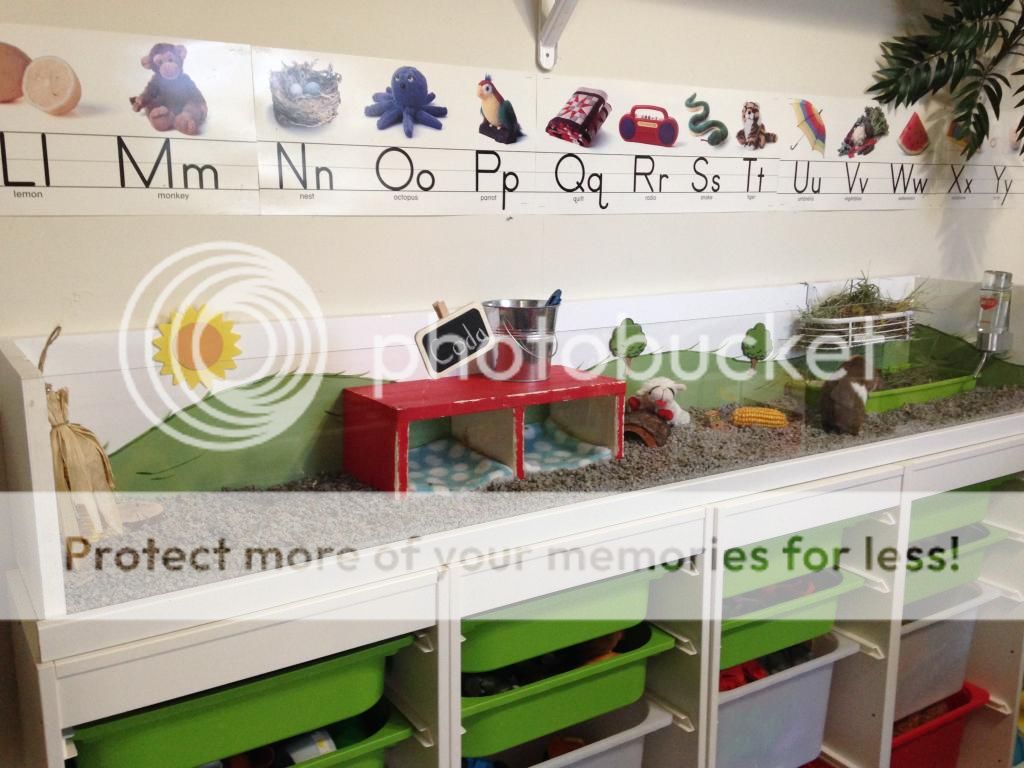
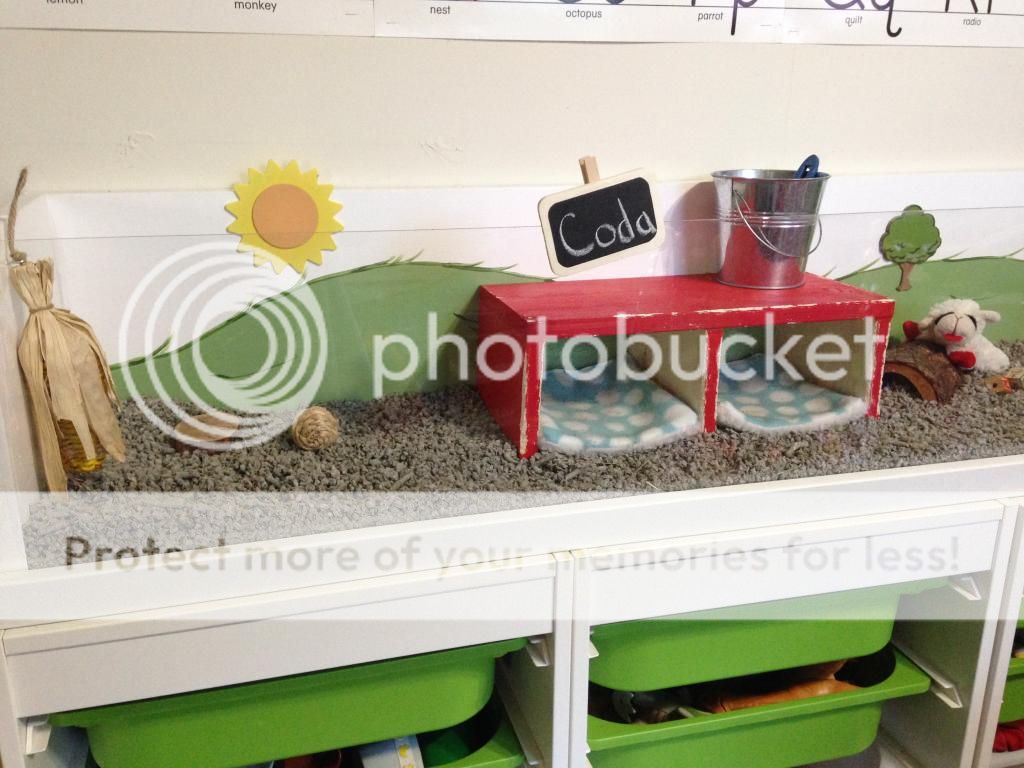
Type: Custom Homemade Piggy Habitat
Size: 7.5 Square feet
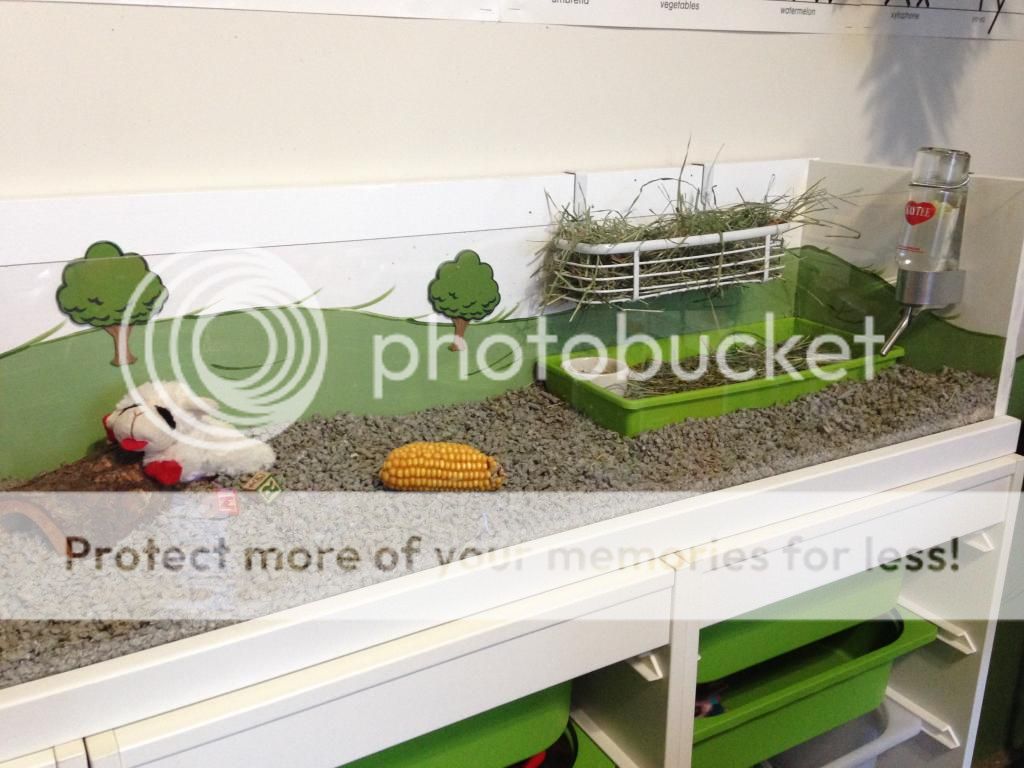
Made: By me, using solid wood, linoleum and a custom cut piece of plexiglass.
How many piggies? 1 spoiled lil piggy
Maintenance: Easy

How it was made: I had to customize the habitat to fit our space on top of our cabinets and wanted it to be solid, but still allow my daycare children to watch the piggy in action, thus the plexiglass front, no chance of accidental fingers getting nibbled on.

I cut the back, floor and sides and attached using wood screws. I used silicone to seal all the seams. Next, I was given a large piece of remnant linoleum from a local home improvement store and I cut an used a staple gun to attach, that way if the floor needs replacing I can just remove staples and replace flooring, but honestly I keep the bedding 2-3 inches thick so wee never even makes it to the flooring.

Next, I used a pro grade strength double sided tape that I purchased at the same store where I purchased the plexiglass to attach the plexiglass front, running the tape along the side front and along the length of the front. I also added a trim piece to the front bottom.

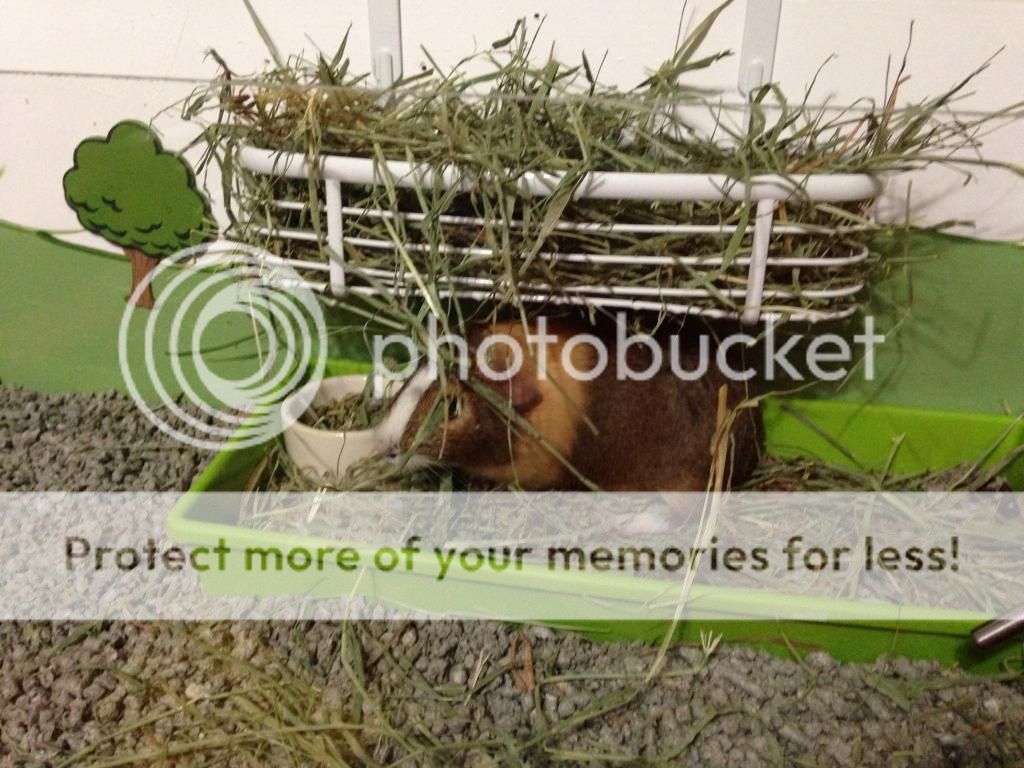
I hand painted the rolling hills to match our daycare playroom walls, and added wooden cut out trees and sun. I used an over-the-cabinet rack as his hay rack, which he loves to sit under and pull the hay from underneath.

PhotoOct0592858AM.jpg

PhotoOct0383321AM.jpg

PhotoOct0383304AM.jpg

PhotoOct0282230PM.jpg

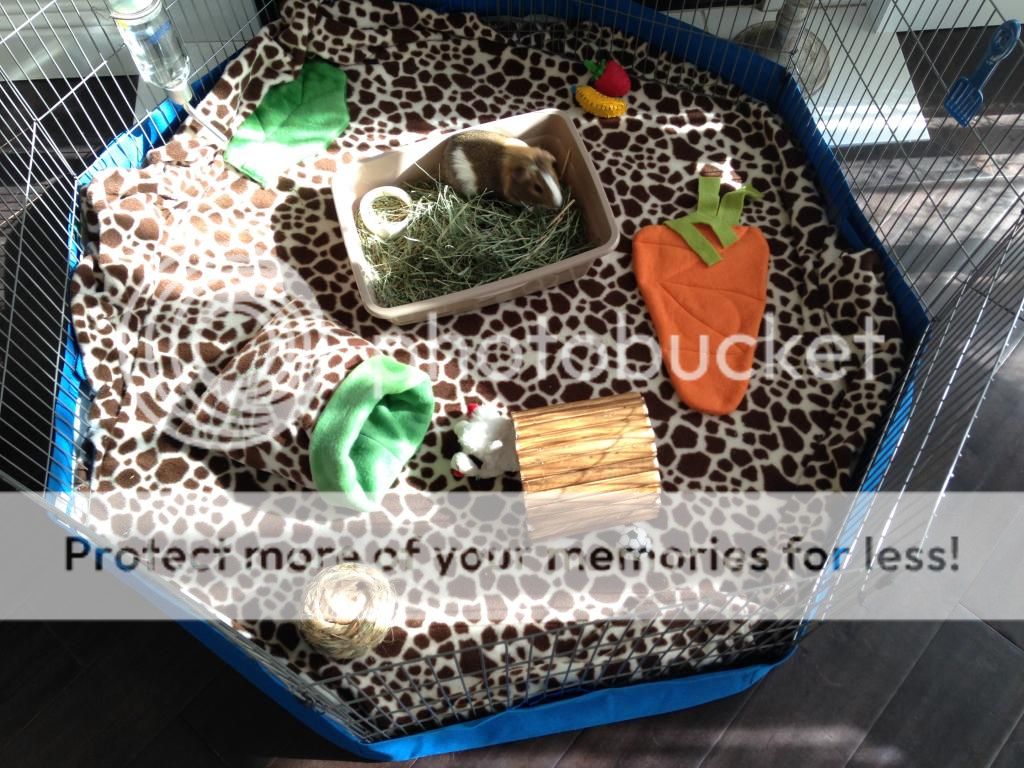
Type: Indoor Play Area.
Size: 14 square feet
I purchased this play pen at a pet store and it came with the waterproof liner. I still lay an absorbent liner pad underneath the fleece. This is where Coda spends the good portion of his day, he loves his play pen, but loves when he gets put back in his home too.
PhotoOct05104738AM.jpg

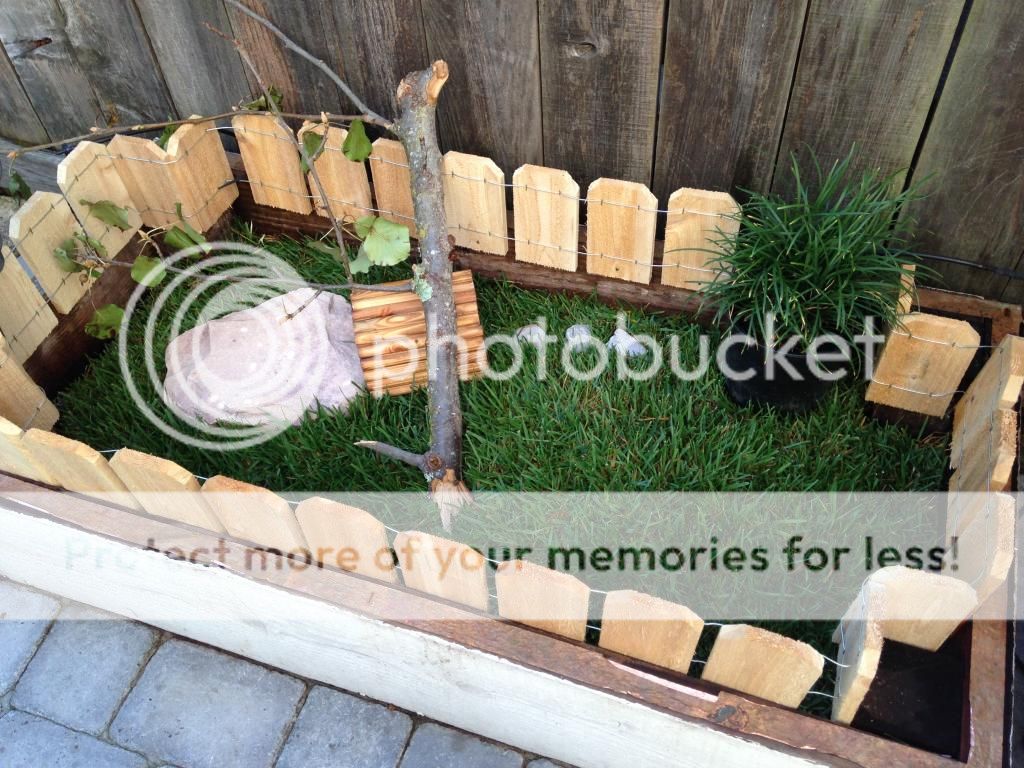
Type: Outdoor Play Area.
Size: 8 square feet
This is a raised garden box that I converted into a outdoor play area. I used the cedar edging as a mini fence and small nails were used to attach it to the garden box. I laid sod, added a stepping stone and accessories. He is never left unattended in this area.
PhotoOct0594742AM.jpg
 
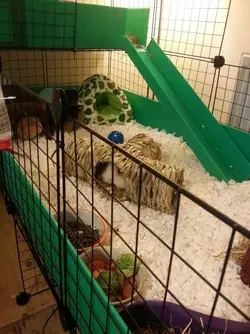
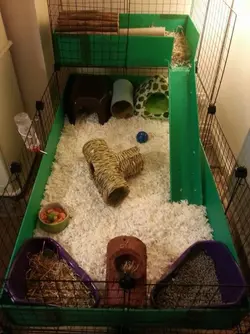
Ok so this is our new C&C cage. It is 4x2 with a 2x1 loft. We got it from http://www.candcguineapigcages.co.uk/ by ordering it online. We are keeping 2 boys in here. They are rescues that we got a couple of weeks ago. After much consideration we decided to use Fitch bedding. We'll see how we go and change if need be. If they don't get on with the ramp to the second level, we will use the loft bit to extend the cage to a 5x2.

So we transferred our boys Vince and Howard in there today and the difference in their behaviour is tangible straight away. Lots of popcorning and running around. They are out from their hidey places far more and seem more comfortable with us being in the room with them (they are youngsters and still getting used to us, so gentle steps). One of them actually went to sleep out in the open amongst the Fitch bedding, which was previously unheard of.

The cage was a little fiddly to put together and took me and my husband working together to get it right, but once it was put together and the cable ties put in the right places, it's fairly solid. Also, I don't think you could easily move it around the house without risking some of it coming apart - so set it up where you intend to keep your piggies.

All in all, delighted with the final result. Can't stop smiling and the boys really seem happy :)

1962816_10152301024406403_7695820919097851644_n.webp 1972366_10152300995971403_6056170181920109177_n.webp 10690133_10152301024051403_4319360656213572681_n.webp 10711038_10152301024821403_6761631222557219927_n.webp 10730938_10152300997121403_2453859351476549199_n.webp
 
Finally this weekend whee had a chance to make the piggies a bigger cage! So exciting - for the pigs of course, not for the adults having to make it... :)

We had to rearrange our entire front room as it tiny and we also have a fish tank and the most uncomfortable sofa that is also an inconvenient 2.3m wide. So we spent around 1 hour trying to measure how we can build the cage without having to move everything. Sadly there just wasn't enough space for 2x4. So we moved everything around (even the fish tank, which weighs a ton!) and made just about enough space.

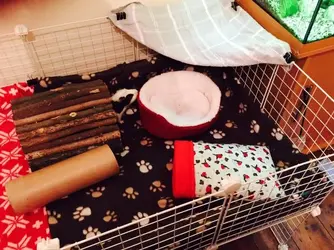
image1_2.webp
We found the grids on eBay and could pick them up which was great as we got around 50 grids and loads of connectors, so we have some spare in case we want to build a loft. We had already grabbed some correx from a local builder who was doing some work and had spare sheets. We use the space underneath for storage which is superb. All in all it was worth the effort.

image2_2.webp
So we are now surprised with the amount of space we have. (So are cookie and crumble!) I now would love to get some blankets etc that actually fit the cage. That'll be the next buy!
We currently have hay in the box, and their food and water next to it. The cardboard tube was a left over from work as well. The hut was standard pets at home (which we could have probably got cheaper elsewhere..).
image3_2.webp
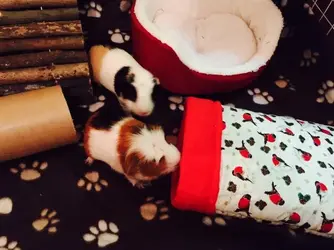
We also got a little cozy cushion (also from p@h) which the pigs don't seem to like getting into, hence why I put the tea towel over the top to try and coax them in.. let's see. If I find poop in it tomorrow I assume they were in it. They also have a lovely snuggle bag which I ordered from cavy couture and cookie absolutely loves it. I also got a tunnel as well, but that needed a wash as it is quite popular... :roll:
image4_1.webp
I got both blankets from Primark, however I don't recommend getting the brown one as it makes scooping their little poopies up difficult - they seem to just blend into the background and you can't find them :hmm:

Overall I absolutely love the new set up. It makes it nicer for the piggies and Mummy when I have to clean up! They now can have floor time cause we want them to, not because I feel sorry for having them in the cage all day! Yay!
 
image.webp
C+C cage.
Got the Seville grids from eBay, 60 for £50 (then another 60 for £55 as they're so hard to get!)
Correx from teacrate packaging
Ramps are pvc guttering from b and q, ramp covering a doormat from b and q cut to fit.
Each of the 2 cages is 4x2 plus the lofts.
2 Guinea Pigs in each cage.

Cleaning - we will have to see! Reaching into the corners is a bit of a pain because of the lofts.

They are really enjoying the cages. They were in ferplast 120s before.
Was important to keep the perimeter clear all the way around as they love running laps around oth their old cages and the new.
 
That's great. Thank you.
So here are the pics of the hidey houses I built. I think these picks will show they're a bit 'cobbled' together!
 

Attachments

  • image.webp
    image.webp
    17.7 KB · Views: 53
  • image.webp
    image.webp
    20.6 KB · Views: 45
  • image.webp
    image.webp
    20.6 KB · Views: 43
  • image.webp
    image.webp
    20.1 KB · Views: 44
  • image.webp
    image.webp
    26.8 KB · Views: 49
This is my old cage it housed 4 piggies, arthur ad oblivion on the top half and colossus and nemmy were on the bottom but with a divide.
Type: 2x5 C&C cage
Made: By me
How many piggies? 4 Boars
Maintenance: Easy except for under the loftsWP_20141030_001.webp

So this is after the shuffle,
Type: 2x5 C&C cage
Made: By me
How many piggies? 3 Boars
Maintenance: Easy peasy - no lofts and more doors

WP_20141031_001.webp

I've swapped the piggies around now that nemmy doesn't have company I have bought him up to my height and have been in touch with local rescues regarding boar dating. I spent a bit more and got white correx its much brighter and cleaner and fresher :) I will add some more decoration to it as it's a tad plain. I have also cleared more space in the room as well and got rid of the horrible shelves I had made from grids lol

Something extra I did this time as well, when I had scored the correx I filled the gap at the crease on the underside with bathroom sealant.
WP_20141030_009.webp
As I could only afford 2mm thickness I wanted to make sure it didn't split like I managed to do before with the black one when cleaning it. Once the sealant was dry I then covered all the creases with white duck tape so the sealant wouldn't flake down from one cage to the other and also to protect the carpet underneith. It is strong and study and I'm super happy with it. and my piggies are too! The white helps brighten it up as well as it's more reflective but I would like to get some lights soon too.
 
my c&c cages are not that great but I am planning on extending them because I feel it is too small for my piggies.
the cubes were from ebay and the plastic was from b&q.
the fleeces were made by using two fleeces and sewing them together.
20141121_173839.webp 20141121_182554.webp 20141121_174238.webp :luv::nod::D
my cage is 4,2 I have at the minute 3 water bottles, a hay rack, 2 wooden tunnels,2 rectangular litter trays, 1 corner litter trays, and 2 pigloos!
 
Hello everybody, This is my first post. I am new to the forum. Te cage is 6'x2' with a 2'x1' hay loft. It cost around £140. The carcass is made from 18mm mdf with 2mm clear acrylic for the window and hay loft walls. The cage is lined with vinyl to stop leakage. I do have lots of pictures if anyone is interested in seeing the build in stages. I will be adding another hay loft that will be accessed from the current loft.20141111_131128.webp
15681-46f3a37a6f44087ffeaf882080af04dd.jpg
 
PSX_20141215_203523.webp i have already shared a few of my past cages but since this one is still up and running , i decided to share an update! i just redesigned my cage today, it's a 2x6 c&c and a 2x2 loft and a little nook for some alone time. i have 5 girls and they are loving it. i am ordering a coroplast base next week for the 2x6 area and the 2x2 will have one as well. i am so excited :yahoo:
 
Cage Type:
C&C 3 x 6 with storage area underneath.
Purchased:
Grids Costco 4 x Packs £15 each
Fleece x 12 Primark £5 each
Towels XL x 12 Primark £5.80 each
Carefresh large bag £20
Number Of Pigs:
1 adding 2 more
Cleaned:
Spot cleaned daily.
Right side towels and fleece twice a week.
Entire cage clean every 6 days.
Can be a bit of a challenge to reach to the back of the cage to clean the corex and lay the towels and fleece blankets neatly.
Would I recommend?:
Definitely YES, however if you have back problems or difficulties reaching or bending I would recommend making the cage a 2 x 6 and have it on the floor for ease of cleaning and maintenance.
IMG_20141227_211129.webp
I've made a few adjustments since this picture so I'll update this picture on my next cage clean day
 
Last edited:
20150108_092936.webp 20150108_092908.webp

So I have moved the ginger monsters into the back room and got rid of the dreaded useless lofts.... they now have a 4x2 each...meaning more room... more hideys and they def spend more time out of the pigloos now.

Before they just sat in the corner litter tray upstairs in the loft

I tied the ramp tunnels to the side of the cage sideways and now they are running tunnels/hidey.

Best thing I did for them!
 
image.webp
Redesigned the girls' cages into two 2x6 cages (was two 4x2 cages each with a 1x4 loft).
Main reason for this is that Piglet (black and white on the bottom level) often chases Peppa away from food and this new layout means she can't block it unlike with the loft.
Ebony and Honey loved their loft, Ebony slept in the doorway at the top of the ramp in fact! They were running and popcorning as soon as they were in the new layout though.
 
This is my new homemade cage:
_DSC1653_1_zps9ff9c5e4.jpg

I designed it and a local woodsmith (in Finland) cut the pieces out of 6,5 mm plywood and 3 mm polycarbonate (some sort of plastic, sorry i´m not an expert in these :bye:). Before assembling the cage, I painted the plywood and wrapped the floor of the cage in a shower curtain to make it pee-proof :D. Then I (read: my boyfriend) assembled the cage using these angle irons (don't know if that's the correct word, but there's a photo of them below.). Assembling took one day.
_DSC1667_1_zps7ff7f2e2.jpg
_DSC1668_1_zpsbdec5797.jpg

Materials costed around 150 euros (120 pounds?) and I think that was money well spent. The cage is really really easy to keep clean which was the main reason why I wanted a new one (the previous was c&c cage). Takes 10 mins per day to clean up with a vacuum cleaner and change the small towels. In addition, the hay loft needs cleaning twice a week, and the carpets need to be changed once a month. No woodshavings, pee and poop on the floor anymore, jee! The size of the cage is somewhere around 2 ft 5 inches X 8 ft 5 inches + 2 ft 5 inches X 6 ft 10 inches. Four piggies live in it (all sows) as a group and I'm planning on getting one more :).
Right side of the cage:
_DSC1655_1_zpsbf6743ec.jpg

The storage boxes are self-made, but the tables are from Ikea. They are the cheapest ones, they cost less than 5 euros.Not too bad, I'd say :D.
Left side of the cage:
_DSC1659_1_zps5d4117cb.jpg

And the hayloft in the center:
_DSC1661_1_zpsfed0cc61.jpg
 
This is my new homemade cage:
_DSC1653_1_zps9ff9c5e4.jpg

I designed it and a local woodsmith (in Finland) cut the pieces out of 6,5 mm plywood and 3 mm polycarbonate (some sort of plastic, sorry i´m not an expert in these :bye:). Before assembling the cage, I painted the plywood and wrapped the floor of the cage in a shower curtain to make it pee-proof :D. Then I (read: my boyfriend) assembled the cage using these angle irons (don't know if that's the correct word, but there's a photo of them below.). Assembling took one day.
_DSC1667_1_zps7ff7f2e2.jpg
_DSC1668_1_zpsbdec5797.jpg

Materials costed around 150 euros (120 pounds?) and I think that was money well spent. The cage is really really easy to keep clean which was the main reason why I wanted a new one (the previous was c&c cage). Takes 10 mins per day to clean up with a vacuum cleaner and change the small towels. In addition, the hay loft needs cleaning twice a week, and the carpets need to be changed once a month. No woodshavings, pee and poop on the floor anymore, jee! The size of the cage is somewhere around 2 ft 5 inches X 8 ft 5 inches + 2 ft 5 inches X 6 ft 10 inches. Four piggies live in it (all sows) as a group and I'm planning on getting one more :).
Right side of the cage:
_DSC1655_1_zpsbf6743ec.jpg

The storage boxes are self-made, but the tables are from Ikea. They are the cheapest ones, they cost less than 5 euros.Not too bad, I'd say :D.
Left side of the cage:
_DSC1659_1_zps5d4117cb.jpg

And the hayloft in the center:
_DSC1661_1_zpsfed0cc61.jpg
That cage is AWESOME! Money very well spent! :o)
 
Here's my C&C. I did a weird configuration to fit the space- it's 3 by 3. The top is 1 by 2. I keep a M/F pair in it, but I'm planning on adding a pig or two! It's 16 sq ft and they have plenty of floor time. I'm planing on switching to aspen shavings in the kitchen/loft and fleece on the bottom. Under the loft is mostly blocked off, except for the grid space occupied by the ramp, so it's their sleeping area. It has a fleece forest that they LOVE and a few cuddle cups. I also put some 4" PVC in for tunnels and I tie wood chews and carrots to the grids so they don't clutter it. I got it from guineapigcages.com as a 2 by 4. For the longest time I used it as a 2 by 3 then I switched sit to this. Before I has a custom cage with tiles, lights, auto feeders, you name it. Unfortunately, they ate it!
 

Attachments

  • image.webp
    image.webp
    261.8 KB · Views: 72
Back
Top